How to make pearl bracelet

How to Craft a Beautiful Pearl Bracelet: A Step-by-Step Guide [...]
How to Craft a Beautiful Pearl Bracelet: A Step-by-Step Guide
Creating your own pearl bracelet is a rewarding and creative endeavor that blends elegance with personal expression. Whether you’re a beginner or an experienced jewelry maker, understanding the types of pearls available and how to pair them with the right clasp can elevate your design from ordinary to extraordinary. This guide will walk you through selecting pearls—such as freshwater, saltwater, and baroque varieties—and choosing suitable clasps like magnetic, toggle, and layering clasps to complete your custom piece.
Step 1: Choosing the Right Pearls–Pearl Bracelet
The foundation of any pearl bracelet lies in the quality and type of pearls you select. Here’s a breakdown of popular options:
Freshwater Pearls: Cultivated in lakes and rivers (primarily in China), freshwater pearls are known for their affordability, wide range of shapes, colors, and luster. They often come in round, oval, rice-shaped, or irregular forms. Because they are nucleated with tissue rather than a bead, they tend to be solid nacre, which enhances durability. For beginners, freshwater pearls are an excellent choice due to their accessibility and versatility.
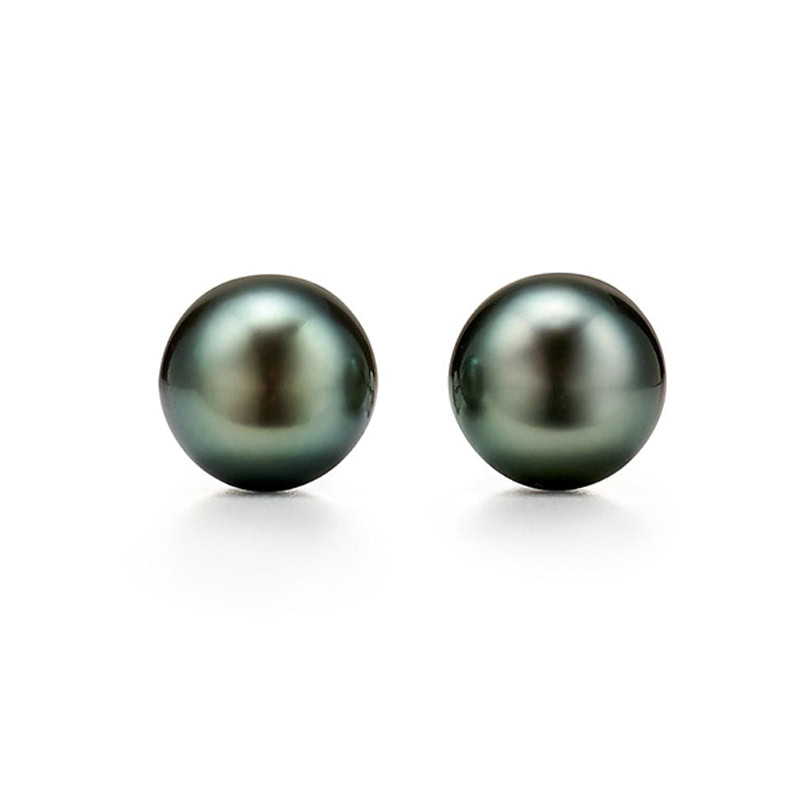
Saltwater Pearls: These include Akoya, South Sea, and Tahitian pearls. Akoya pearls, typically from Japan, are renowned for their brilliant luster and near-perfect roundness. South Sea pearls (from Australia, Indonesia, and the Philippines) are larger and feature creamy white or golden hues. Tahitian pearls, often called “black pearls,” display dramatic overtones like peacock green, silver, or eggplant. Saltwater pearls are generally more expensive but offer unmatched sophistication.
Baroque Pearls: Defined by their irregular, non-spherical shapes, baroque pearls add artistic flair and uniqueness to any design. They can be found in both freshwater and saltwater varieties. Their organic forms make each bracelet one-of-a-kind and are ideal for bohemian or avant-garde styles.
When selecting pearls, consider consistency in size, color, and luster if you desire a classic look. Alternatively, mix shapes and tones for a modern, eclectic aesthetic.
Step 2: Planning Your Design
Before stringing, decide on the bracelet’s length (standard is 7–7.5 inches for women), pattern (uniform beads or alternating sizes), and whether you’ll incorporate spacers or accent beads (e.g., gold-filled beads or tiny crystals). Sketch your design or lay out the pearls on a bead mat to visualize the final product.
Also, choose your stringing material. Silk thread is traditional and elegant but requires knotting between each pearl to prevent loss if the strand breaks. Nylon-coated stainless steel beading wire (like SoftFlex) offers strength and flexibility without frequent knotting—ideal for heavier or larger pearls.
Step 3: Selecting the Perfect Clasp–Pearl Bracelet
The clasp is both functional and decorative. Here are three popular options:
Magnetic Clasp: Easy to fasten and unfasten, especially for those with limited dexterity. Magnetic clasps come in various metals (sterling silver, gold-plated, etc.) and often feature smooth, rounded designs that complement delicate pearl strands. Ensure the magnet is strong enough to hold the bracelet securely during wear.
Toggle Clasp: Composed of a bar and a ring, this clasp adds a subtle design element. It’s reliable and stylish, particularly when the bar is embellished or matches the pearl’s tone. Toggle clasps work well with medium-weight bracelets and are less likely to accidentally open than lobster clasps.
Layering Clasp (or Multi-Strand Clasp): Ideal if you plan to create a stackable or multi-strand pearl bracelet. These specialized clasps allow multiple strands to connect neatly at one point, maintaining a clean, cohesive look. They’re perfect for modern, layered jewelry trends.
Whichever clasp you choose, ensure it complements the pearl’s style and metal accents (if any). For example, warm-toned golden South Sea pearls pair beautifully with rose gold clasps, while cool-white Akoya pearls shine alongside platinum or silver finishes.
Step 4: Stringing and Finishing
If using silk thread:
- Thread a beading needle and tie a small knot at the end.
- String your first pearl, then add a knot after each subsequent pearl using a knotting tool or tweezers.
- Once all pearls are strung, attach the clasp using crimp beads or by tying and securing the thread with jeweler’s glue.
If using beading wire:
- Cut a piece about 2 inches longer than your desired length.
- Add a crimp bead, pass the wire through one half of the clasp, loop back through the crimp, and flatten it with crimping pliers.
- String your pearls, then repeat the crimp-and-clasp process on the other end.
Always test the pearl bracelet’s fit and security before wearing.
Final Thoughts
Crafting a pearl bracelet is more than a craft—it’s an act of personal storytelling. By thoughtfully selecting your pearls and pairing them with a complementary clasp, you create a timeless accessory that reflects your taste and creativity. Whether you opt for the classic symmetry of Akoya pearls with a toggle clasp or the free-spirited charm of baroque freshwater pearls with a magnetic closure, your handmade bracelet will carry both beauty and meaning. Happy crafting!
Share This Article

Written by : Svenja Han
Follow Us
Latest Articles
July 28, 2026
July 28, 2026